Showing posts with label cooking. Show all posts

Tuesday, February 5, 2013

Lookin' Good!


   These looking so amazing to me! I cannot wait to make and try them out. A bunch of good for you veggies, wrapped into a delicious package with peanut dipping sauce.

Yummo~
Heather

Sunday, December 16, 2012

Sugar Cookies

Thursday night after our family watched another Hallmark Christmas movie...I decided to bake some sugar cookies for a "midnight" snack! Not the wisest of choices when you start them at 8pm...they really did turn into a "midnight" snack. ;) But, they are ever so worth it. Simple, quick, and they turn out almost perfect every time. 


Here is the recipe:

SUGAR COOKIES

3/4 cup Butter, at room temperature
1 cup Sugar
2 Eggs, at room temperature
1 tsp Pure Vanilla Extract
2 1/2 cups Flour 
1 tsp Baking Powder 
1/2 tsp Salt 

*Whip butter until creamy. Add sugar, eggs, and vanilla; mix well. 
*Add flour, baking powder, and salt. 
*Form into a ball.

*Wrap in lightly floured plastic wrap.
*Chill at least 1hr (this is the secret to perfect sugar cookies).
*Roll dough on floured surface, cut, and bake at 400° for 7-8 min.

Makes about 2 dozen...depending on how thick you make your cookies. 


I double my recipe! (And since no one ever has a big recipe and I have to do the calculations myself while baking, I'm adding the double recipe for big families) :)

Sugar Cookies-Doubled

1 1/2 cups Butter, at room temperature
2 cups Sugar
4 Eggs, at room temperature
2 tsp Pure Vanilla Extract
5 cups Flour
2 tsp Baking Powder
1 tsp Salt

*Whip butter until creamy. Add sugar, eggs, and vanilla; mix well. 
*Add flour, baking powder, and salt. 
*Form into a ball.
*Wrap in lightly floured plastic wrap.
*Chill at least 1hr (this is the secret to perfect sugar cookies).
*Roll dough on floured surface, cut, and bake at 400° for 7-8 min.

Makes about 4 dozen...depending on how thick you make your cookies. 

Buttercream Frosting  

12 oz Butter, at room temperature
1 lb Powedered Sugar, sifted
1 - 1 1/2 tsp Pure Vanilla Extract

*Cream butter with the paddle attachment in your mixer. 
*Add the sifted powdered sugar ... once the mixture has come together, stop and scrape the bowl and paddle attachment. 
*Turn your mixer up to medium speed and paddle for about 5 min to make the mixture light and fluffy. 
*Turn mixer to low and vanilla and if you want to add any other flavorings; once incorporated return mixer to med speed and continue to paddle for 2 more minutes.

~I use little plastic containers to divide up the frosting and add the food coloring. If you're like me and want a lot of colors to choose from, be wise in your coloring choices. By that I mean...you don't want to have to make a ton of frosting just to have color options. So for me, I frosted all the Christmas trees first with the green, and a few mittens. Used up as much green as I was going to, then added a few yellow and red drops, to get brown for the tree trunks & gingerbread men. Make sense? Any other time I would have just made brown to begin with, but then you're left with a lot of wasted frosting...that adds to the expense, and the waste...not good. So make a plan! :)


Here are a few pics:


Don't mind the white ones...those were the "midnight snack" ones. ;)

Hope you enjoy these as much as our family does~ 
Heather 


Friday, November 23, 2012

Thankful November Day 23

I have gotten behind again...and I'm not going to try and catch up, or I'll just laps another time. ;) So I beginning from today...

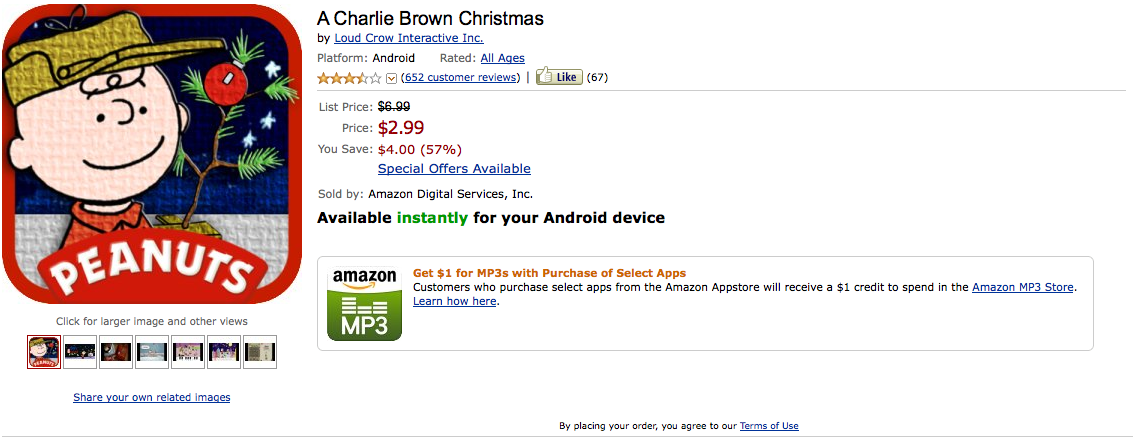
Day 23- Today I am thankful for the Charlie Brown Christmas App for our Kindle Fire! What an adorable app! It's on sale here at Amazon.com for $2.99! That's a great deal, in my opinion! It's an interactive book. It will read to them, they can decorate Christmas trees, throw snowballs, and it uses all the characters voices while it's narrated (you have the option to turn the narration off, you find hidden ornaments throughout the book to add to your tree...just very cute!


 Hope you are all recovering from your turkey comas...I  very much enjoyed our spread yesterday. Our included: Turkey, cranberries, garlic mashed potatoes, stuffing & dressing, creamed corn, green bean casserole, rolls, green apple jello stuff, jello jigglers, Martinelli's Sparkling Apple Ciders, and last but not least...pies: Pumpkin, chocolate cream, & strawberry rhubarb! It was delicious and surprisingly...not overwhelming. :) How was your's!?

Tuesday, April 12, 2011

Marinated Flank Steak

  This is my mom's Marinated Flank Steak recipe. SO good! I'm not the biggest fan of beef (unless it's in a hamburger smothered in sauce and toppings, or wrapped in bacon a.k.a. Filet Mignon), but this is absolutely one of my favorite meat dishes hands down, ever...well I guess it could be tied with Baby Back Ribs smothered in BBQ sauce, but you get the idea. I was wondering if I should share it, because if you come to our home for dinner, this is probably what I'll serve you.  :) But, in the good fashion of sharing (our mothers always told us to) I will.

Flank Steak Marinade

1/4 cup brown sugar
1/2 cup oil
1/2 cup soy sauce
2 Tbsp sliced green onion
1 tsp ground ginger
1 Tbsp minced garlic
3 tsp sesame seeds

*Grab a mixing bowl, gallon size Ziploc freezer bag, and your ingredients.
-Put the Ziploc inside the mixing bowl (this holds your baggie in place while you add the ingredients.)
-Add all ingredients, zip, and shake. Making sure all brown sugar is dissolved.
*At this point, you'll need your flank steak. Cut the steak into 3 even pieces (this allows the marinade to really get into all the meat evenly.) 
-Then zip, and freeze. Freezing is super important...the meat seems to suck the marinade into itself when frozen, and you get so much more flavor then if you were to just marinade in the fridge overnight.

  Super easy and packed with tons of flavor! The meat is tender and you don't even need a steak knife to cut it...unless you are me and forgot to cut against the grain once. Makes for some tough meat! And when you are spending the price of flank steak, you don't want to screw it up. I also serve this with Garlic Mashed Potatoes and Sauteed Garlic Green Beans. Yes, we love garlic in this home.

 You'll want to BBQ the steak on medium heat for 6-8 minutes on each side, depending on how done you like it. This will give you medium, still pink meat, preferred by most. I like mine dead...no pink...at all. So Bob leaves one section on for a bit longer just for me. :) The only area I'm really high maintenance in would be how my meat is cooked and the food I eat (I'm just picky)...give me some slack! lol


  Yummy Garlic Mashed Potatoes...sorry I don't have a pick of the green beans, but they are heavenly!! Put a little butter and olive oil in the bottom of a pan throw in fresh French Green Beans (get them at Costco) add minced garlic (tons of it) and kosher salt. You want to cook them fast and on high heat so they don't get soggy. The garlic browns a bit and gets kind of caramelized. This is the only way I can eat green beans. They still have their crispness and are infused with tons of flavor. Heavenly I tell you!

  Now that it's getting to be BBQ season, try it out! You won't be disappointed. At least I don't think you would be! ;)

Enjoy~ Heather

Friday, February 11, 2011

Freezer Meals

  I know I have written about this subject before, but I thought I'd revisit it. Have any of you ever done freezer meals, or monthly meal planning? Well, if you haven't, keep reading, it is wonderful thing to start!

  I originally bought this book Fix, Freeze, Feast, 2 years ago, to start a "Club" of moms who got together monthly and prepared meals together. It was in the works with about 4-6 ladies with families of the same size. I believe football season started for our boys and things just got to busy to actually put our plans into action. Sad, but true. I ended up doing it on my own and it was such a relief in my household chores. I would just wake up, decide what sounded good for dinner...pull it out of the freezer and let it thaw some on the counter and put it in to cook when the time was right. I had a homemade, healthy, no fuss, no mess, yummy meal awaiting my hubby and family when he got home from work. It made meal time pleasurable instead of stressful. It is quite nice too that these recipes are for a "club" of sorts, so all the recipes are for really big batches. I cut them in half or thirds depending on the recipe for one meal to feed our brood. Family dinner is SO important! How many families do you know that sit together at a table for dinner every night? This is one thing that Bob and I both think is so important for our family. Maybe once a week (but hardly ever) do we not actually sit together at the table and have dinner.

  I am an extremely picky food person. If I could get a job sniffing out drugs trying to be smuggled in/out of the country, like a narcotics dog...I'd be a millionaire! Unfortunately when it comes to the smell of food, my nose is more of a problem than a blessing. Wat too sensitive! I hate to admit this, but usually when I'm cooking dinner, I try to breath through my mouth, so I don't smell what I'm cooking...otherwise it becomes unappetizing. Again, sad, but true. Maybe this is why I prefer to eat out. I never have to smell it being cooked, or see what is going into it. lol Sorry, I get sidetracked...so the gist of this rant is that I'd probably eat about half of the recipes that are in this book. Which means if you are a "normal" person, you'd probably be willing to eat almost all of them. :)

  These are a few of my favorites: 

      *Garlic Mashed Potatoes
      *Margarita Pork Chops
      *Breakfast Burritos
      *Granola
      *Manicotti


 There is a Freezer Inventory list to keep track of what you have put in and taken out. 
  Also, these Freezer Labels with directions for cooking, that you can print out and attached to your meals before placing them in the freezer.
  A perfect idea for meals maybe for a family that just had a new baby, or for any other reason that may come up to give a meal! Instead of it being a burden to figure out what you're going to give, and how you'll have time to do it, this allows you many options at your fingertips so that you may give freely without hesitation. That in itself is a blessing!

-I did notice that the cover is new on Amazon for this book, but I would assume that the meals are the same, or if anything, improved.

  I encourage you to look into this type of meal planning. You and your family will be blessed by it. I have gotten out of the habit of using the freezer meals when we moved and I am hurting because of it. I have gotten into the habit of not figuring out what we are having until 30min before we need to eat. Not a good idea! So, back to what I know works for us...I can't wait to start again. It's actually quite fun to take one day and prepare all your meals for the month, or even 2 weeks at a time. It's one day of messes and hard work, for a month of ease. Anything to help be organized and do our jobs of keepers of our homes, in a way that is pleasing to the Lord.

Blessings~Heather

Thursday, January 27, 2011

Pizza

  Our family LOVES pizza. It's one of those foods that could be eaten here morning, noon, and night. I don't know what it is about this food, but we just can't seem to get enough! 

  Our favorite is BBQ Chicken Pizza. We use Pioneer Woman's recipe. Although, I do not use the hunk of Mozzarella (it's too expensive at our stores), I just buy the shredded package of Mozzarella or the block depending on which is less expensive. We love using "Sweet Baby Ray's" BBQ sauce. It's the best and you can get it in bulk at Costco! ;) Cilantro is used as a topping once it's out of the oven, and some might think "really?" such as my dear husband, but it makes the pizza! Even he agreed after trying it (we are very daring when it comes to trying new things!lol) 


  I did however come across this recipe for pizza crust that is amazing from the Mad Hungry Blog. It's Lucinda's Basic Pizza Dough. It really truly taste like restaurant pizza crust. 

  Now, I haven't used it with the BBQ Chicken Pizza yet, but I think next time I make it, I'll be trying it. Pioneer Woman's Basic Pizza Dough is more my style though. It only takes about 5 min. to prepare and I only have to wait 1 hr while it chills in the fridge before I can roll it out. I'm always running out of time...so this is the perfect recipe for me. Lucinda's Basic Pizza Dough takes at least 3 hrs to rise or overnight in the fridge. But, the wait is well worth it.

  I'm telling you, "You won't be disappointed if you try it!" Yum, it makes me hungry just thinking about it. :)

Monday, August 16, 2010

Are you going Bananas...I'm going Bananas!


Shelby is enjoying the bounty of Banana Bread! What a sweetie :)


So, the story goes...Alexis and I were at Freddy's and were about to pick up some bananas that are usually $0.49-$0.69 cents a lb. When my eye caught some "ORGANIC" ones with red tape all around them. "Hum" I said. What's with all the red tape?!?! So, I went up and squeezed one thinking "they've got to be going really bad"...wrong! They were perfectly firm on the inside, but ugly and rotten looking on the exterior. Then the best part...I looked up and there it was $0.29 cents a lb!!! Hello, "I think I hit the mother load" I say to Alexis. She looks oddly at me, then I explain how these are 1/2 the price of "normal" bananas, but 1/3 the price of "ORGANIC!" She shrugs and says "ok." lol (Yes, I'm crazy, yes, I love a bargain, yes, my children eat tooonnns of bananas) Seriously, there was an entire pile of bananas lookin' all ugly and being perfect inside, and calling my name! Ha *There were 3 more bunches that I had already cut up to freeze that aren't pictured*

What does one do with so many bananas?!? I cut up the worst looking ones to freeze, since I figured they'd go bad first. Placed them on cookie sheets.

Cleared out two shelves in the freezer for all these beauties, froze them, then placed them in a Ziploc baggie for smoothies!

This is the scrumptious banana bread that we made.

It's supposed to be a healthy recipe, but I was out of all the healthy stuff, so I improvised to make this:

Banana Tea Party Bread

*1 3/4 cup Flour (whole wheat)
*2 tsp Baking Powder
*1/2 tsp Salt
*1/2 tsp Cinnamon
*1/3 cup Brown Sugar

-On a separate plate, I mashed and combined:
*2 Bananas
*4 Tbsp Olive Oil (canola oil)
*4 Tbsp Sour Cream (plain yogurt)
*2 tsp Vanilla Extract

-Then add and combine the wet ingredients to the dry ingredients bowl.

-Pour batter into loaf pan 9x5. Sprinkle with Brown Sugar over the top, for a crunchy sugary topping!

*Bake at 350 degrees for 45-55 minutes (or until knife comes out clean)

*() these are the ingredients that I didn't have. ;)

YUM!

Thursday, July 29, 2010

Baby Food

After a conversation with the ladies at the park yesterday I was inspired to make something "homemade", and I decided...baby food. You can't really go wrong, right?! Also, my camera battery died so I couldn't take pics, but as soon as it's charged I'll make more and post. :)

*BAKED APPLES

-2 Apples, cored
-A pat of Butter for each
-Cinnamon

*Core your apples, then put your pat of butter in the opening, sprinkle with some cinnamon. Place in a pan (I used a loaf pan) fill with about an inch or two of water. Bake at 400 degrees for 30 minutes until soft (I turned them over half way through cooking).

*Once cooked, slice into chunks and place in a food processor. Pulse for a few seconds, look at the consistency and add a spoon full or two of left over water through the top of processor. Continue until desired consistency is met. Spoon into a muffin tin and place in freezer. Let it freeze overnight until frozen. On a sheet pan, fill with an inch or so of hot water, place muffin tin on it and wait a minute then remove, and turned upside down and they should come out just like ice from an ice cube tray!

**I wrapped each "puck" in plastic wrap, then foil and labeled for the freezer. I hear they last for 1 month. Miss Shelby enjoys eating them frozen to relieve teething pains. The big kids tried them, and asked if I could make more and make them into Popsicles...sounds a little gross, but they assure me it's really good. :)

*CARROTS

-As many Carrots as you want to cook (I used 4 or 5 big ones)

*Wash and remove ends of carrots. Chop into one inch chunks. Place a few inches of water into a stock pot, add a steamer pan/basket over top, turn stove onto high, put a lid on. Once boiling, add carrots to steamer pan/basket. Allow to cook for about 10-15 minutes or until tender.

*Add cooked carrots to food processor. Pulse for a few seconds, look at the consistency and add a spoon full or two of left over water through the top of processor (I think I read that if your baby is under 7 months of age, you SHOULD NOT use the left over water! Something about NITRATES. Use breast milk, or fresh water instead). Continue until desired consistency is met. Spoon into a muffin tin and place in freezer. Let it freeze overnight until frozen. On a sheet pan, fill with an inch or so of hot water, place muffin tin on it and wait a minute then remove, and turned upside down and they should come out just like ice from an ice cube tray!

**I wrapped each "puck" in plastic wrap, then foil and labeled for the freezer. I hear they last for 1 month.

Super simple and super healthy for you wee one!

Saturday, February 20, 2010

Raspberry Parfait


We tried this one for breakfast last week, and Loved it! I honestly didn't think that I would, but it was really good. It was a little tart, so if you try it, you might want to use sugared strawberries, and raisins, or something less sour than plain raspberries, and Craisins. You might also want to cut this recipe in half, unless you want extra.

Serves 8

Ingredients:
*1 cup of Crasins
*3 tsp. finely shredded orange peel (set aside)
*6 Tbsp. orange juice
*2 tsp. vanilla
*2 8oz. packages of cream cheese, softened
*3 Tbsp. raw cane sugar
*2 cups frozen raspberries (fresh when in season)
*2 cups homemade granola (I used the recipe from "Fix, Freeze, Feast" book)
*Honey
*Shredded orange peel (optional)

1. In a small bowl combine Craisins and orange juice. Cover and microwave for 45 seconds; let stand 1 minute to plump Craisins. Stir in vanilla; set aside.
2. In a mixer combine cream cheese and sugar; beat on medium speed until smooth. Stir in Craisin mixture and the 3 tsp. of orange peel.
3. In 6 tall glasses layer cream cheese mixture, granola, raspberries, and repeat layers. Drizzle with honey and top with additional orange peel.

*I made this big of a recipe so that I could have leftovers. Just put your cream cheese mixture into a sealed container and store in the fridge. It's quick and easy to put together in the morning. We used wine glasses for fun...it looked really pretty, and the kids thought it was a great treat!

Thursday, December 17, 2009

Menu

This weeks menu so good that I had to post about it!

Monday-
Chipotle Honey Tangerine Glazed Chicken
Tuesday- Ate out
Wednesday-Nacho Ordinary Taco Salad with Creamy Lime Cilantro Dressing
Thursday-Garlic, Lemon, and Herb Rubbed Chicken, with Grilled Flat Bread
Friday-Grilled Apple Brined Pork Chops, with Onion Straws, & Sweetie Pies
Saturday-Fried Chicken Rollups, with Guacamole

Seriously good food! If you want the recipes, comment and I'll email whichever one you want. I know they sound like a lot of work, but as long as you have an orange squeezer, it takes hardly any time for these meals. Chop and throw in baggies. I've been preparing them right after breakfast every morning so that all I have to do is pull them out of the fridge, and grill or fry. Truthfully the kids did most of the prep work! Alexis squeezed tangerines, Ty chopped all the herbs with my Pampered Chef chopper, Gabriel stirred everything and held the bags open for the food to be put in. Addie threw all our garbage away for us. It's been fun letting them do so much. So, I'm not lying about how easy these are! As long as you have a kid that can read, they can make at least 3 of these meals...with supervision of course. :) Plus they feel great for being allowed to do such "grown up" things! It's been a great week....

Thursday, August 13, 2009

Meatball Sub Sandwiches

The Meatball Sub Sandwiches we made for dinner were so good, that I had to share! Now I didn't measure anything (I know you who love exact measurements are going to hate this, but guess on your tastes!).

Ingredients:
Meatballs:
2 lbs of hamburger meat

1 onion, diced

10 cloves garlic (about a handful), diced

salt

pepper

grated parmesan cheese (about a handful)

Italian seasoning (I used the Pampered Chef bottle that I had in the cupboard)

bread crumbs (about a handful)


olive oil for frying


*usually I'd put an egg or two in to keep it together, but I forgot when I was making them, and they turned out fine. I really should write down the recipe so I don't forget to put things in!

jar of spaghetti sauce
6 kaiser rolls mozzerella cheese
baking sheet


Directions:

1. Smash all the meatball ingredients into a pulp (or just until you think it's mixed in well).

2. Roll into whatever size meatballs you desire.

3. Heat skillet or pan on medium heat with the olive oil.
4. Cook the meatballs in batches. I like mine to be crispy, so just cook it until your liking.

5. Heat the spaghetti sauce in a sauce pan, and as the meatballs are finished put them on paper towels to remove the oil, then add to the sauce. Cover with a lid.

6. Heat oven to 450 degrees.
7. Cut kaiser rolls down the center (don't cut them all the way through, or you'll have meatballs in your lap!).

8. Add meatballs and sauce to the kaiser roll. As many meatballs as you want!
9. Add mozzerella cheese to the top.
10. Put on cookie sheet and place in oven for about 4-5 minutes, or until the cheese is melted. (you can broil these, but I always burn them because I forget to check them. I know you see a pattern, I forget a lot!) Broiling them does make them nice and crunchy on top!
11. Eat!

Monday, June 29, 2009

Freezer Manicotti

I have been toying with all these freezer recipes from "Fix, Freeze, Feast", and most I've tried have been really good. Tonight we tried the Manicotti. For our family of 6, I split this recipe in half. It left us with some leftovers for lunch tomorrow, which I like!

Manicotti

makes 4 entrees, 4 servings each


1 (48oz) container cottage cheese (6 cups) (I used ricotta)
2 eggs, lightly beaten 3 cups shredded mozzarella cheese (about 12 oz)
1 cup shredded Parmesan cheese (I used grated)
1/2 tsp salt
1/2 tsp black pepper
2 (8oz) boxes manicotti (12-14 shells in each box), uncooked 12 cups
Basic Red Sauce (recipe below)

Four 8 inch square baking dishes (I used a 9x13 pan for my half recipe)
Plastic Wrap

Aluminum Foil


1. Mix cottage cheese (or ricotta), eggs, mozzarella, parmesan, salt, and pepper in a large bowl. With your fingers or a spoon, stuff filling into manicotti shells.


2. Spread 1/2 cup sauce in the bottom of each baking dish. Place six or seven manicotti in each dish. Divide remaining red sauce evenly over the four dishes of manicotti. Wrap each dish entirely in plastic wrap.

3. Top with foil, label, and freeze.

To cook one entree:
1. Thaw one entree in the fridge or bake it straight from the freezer.
2. Preheat oven to 350 degrees F.
3. Remove plastic wrap and foil from baking dish and replace foil. Bake for 45 min. if thawed, 1 hour if frozen (frozen, mine took 2 hours with the 9x13 pan). Remove foil and continue baking the noodles until tender.

Basic Red Sauce: Small Batch


makes about 10 cups (leftover, I had one 1 quart bag to freeze)


1 (12oz) can tomato paste
2 cups hot water
2 Tbsp dried parsley
2 Tbsp minced onion
1 Tbsp minced garlic
1 Tbsp sugar (I used raw cane sugar)

2 tsp salt
1/2 tsp dried basil
1/2 tsp dried oregano
1/2 tsp thyme
1 (28oz) can tomato sauce
1 (28oz) can diced tomatoes


Several 1 quart freezer bags

1. Mix tomato paste and hot water in a large bowl until smooth. Stir in parsley, onion, garlic, sugar, salt, basil, oregano, and thyme.
2. Add tomato sauce and diced tomatoes; mix well. Do not cook.
3. Measure sauce into appropriate portions for immediate use. Divide remaining sauce evenly among 1 quart freezer bags for later use.
4. Seal and label each bag with the amount of sauce inside. Freeze.

To Enjoy:
1. Completely thaw one bag in the fridge.
2. Use in a recipe calling for tomato sauce, or simmer in a saucepan over med-low heat for 20 min. and pour over your favorite pasta.
3. To use in a meat sauce, brown and drain 1 lb lean ground beef for every 8 cups of sauce; add cooked beef to sauve and gently reheat.

Friday, March 20, 2009

Next Week's Menu

Hello Again :}

It took me an hour this afternoon to plan and write out my grocery list for this next week (the kids were making a disaster of the kitchen floor with playdoh, but it gave me the time to "plan").

I have found that by planning my menu's I actually save a lot of money. My grocery list always looks awfully long, but I seem to spend less then I would by "flying by the seat of my pants!" We are huge snackers at our house, so it is hard to not have tons of snacks awaiting our hungry hands, but that's where it starts to get spendy! This way, it allows us to actually have a good dinner almost every evening, and possibly get healthier in the process.


Monday

Breakfast-Eggs w/ Toast (maybe bacon if I'm in the mood to actually cook!)
Lunch-Hot Dogs & Apples
Dinner- *Chipotle Pork Quesadillas

Tuesday
Breakfast-French Toast & Fruit
Lunch-Turkey & Provolone Cheese Sandwiches & Chips
Dinner- *Panda Express' Bejing Beef

Wednesday
Breakfast-Cereal & Yogurt
Lunch-English Muffin Pizzas & Grapes
Dinner- *Chicken Pot Pie with Mashed Potato Top

Thursday
Breakfast-Eggs & Yogurt
Lunch-Taco Salads
Dinner- *Island Bird: Pineapple Rum Chicken

Friday
Breakfast-Cereal & Toast
Lunch-Turkey & Provolone Sandwiches & Fruit
Dinner- *Eat out! (I have my ultrasound at 4:45pm, so once that is over, we will most likely eat out)

If anyone would like any of these recipes email me (messybunch@gmail.com), or leave a comment below! I just don't feel like typing out or scanning in all the recipes right now:-)

Sunday, December 21, 2008

Warning: Only Eat Once A Season!!!

Seriously, you can't eat this more than a couple times a year! You will need a cardiologist for your clogged arteries. Bob swears every time he eats it, he feels his heart slow down!

But, it is ohh so goood! Perfect for cold weather days. We eat this every "Harvest Night" in October.

I thought I would post my Baked Potato Soup recipe, for those of you who have asked for it, and I have never followed through with giving it to you. This is Addie's favorite meal, and mine too.

ingredients: serves about 10 adults?
or in our case, 5 adults, and 4 kids, with a couple bowls left over!


*10 lbs of baking potatoes- baked until soft, cool, then remove skin, and chunk into pieces
*1 lb of bacon, cooked until crispy, then chopped up into bite size pieces, topping for soup
(keep about 1-2 Tbs of bacon grease to saute onions, and garlic, i like to keep the little bits of bacon left in the pan too!)
*2 medium sized onions, diced
*4 garlic cloves, diced
*1/3 stick of butter
*4 Tbs of flour
*1 or 2 Tbs of dried basil
*salt
*pepper
*4- 14 oz cans of chicken broth
*quart of half & half
*sour cream
*4 cups of cheese
*green onions, for topping soup when finished


to make:

Saute onions, and garlic, in butter, and bacon grease on medium heat, for 2-3 minutes until translucent, but not soggy. Add, flour, basil, salt, and pepper, to onions, and garlic, stir for 2 minutes. (you might have to add more flour depending on how much moisture the onions have) Then add, chicken broth. Bring to a boil. Boil for 2 minutes stirring occasionally. Turn heat down to medium low, and add potatoes. Do not let them boil! Once potatoes are incorporated, add the half & half, and stir. Then add, cheese, a spoonful of sour cream, and let it heat up on med. low heat.

*At this point you can add any toppings you like. My family likes the sour cream, green onions, and bacon. But, I'm sure you could come up with your own spin on it:) I add these toppings to each individual bowl, just because, I don't like soggy bacon. And if you have left overs, it will get soggy in the soup. Believe me you want left overs! It just gets better with time;)